Monday, June 24, 2013

Estonia

Verivorst, Mulgikapsad, and Black Bread

What started out as a country that appeared to have a simple menu became quite the ordeal... I originally planned on having this on June 20, but difficulty in procuring the necessary ingredients and getting the right bread pan thwarted me.  And, being a tad OCD, I had to do it right...

The national dishes of Estonia are verivorst with mulgikapsad.  I began my research by looking for a recipe for mulgikapsad, which is sauerkraut stew, and the recipe was easy to find, easy to get ingredients for, and easy to follow.  Where I first ran into trouble, though, was deciding that I needed some good bread to go with the stew.  Upon Googling "Estonian bread," I learned that apparently Estonian black bread is essential to any meal.  So, I found a recipe that was easy to follow.  So began my adventure.

The bread itself takes multiple days to make; I needed a sourdough starter that needs at last five days to be ready.  Then, I needed a rye soaker that must soak overnight.  In addition, I needed to prepare a rye sour that needs 12-15 hours of wait time.  Finally, the bread is gummy inside when it first comes from the oven, so it needed 24 hours to rest before I could cut it.  Feeling accomplished for always looking at my upcoming recipes at least a week in advance, I set to work.

To begin with, I needed a sourdough starter.  This seemed simple enough to do on my own, but realizing that I would need to purchase a 5-gallon bucket, and thinking about having a vat of yeasty, sour goop around the house, I decided to take a shortcut and purchase a sourdough starter from amazon.com.  I ended up with one from a site called breadtopia, which I received quickly and that came with clear instructions.  I started "feeding" (gross) the starter everyday by adding 1/3 c. flour and 1/4 c.water and letting it grow in a bowl on my counter.  This step was simple, but since it took longer and longer and longer to get the needed ingredients for the bread recipe, and since I had to feed the starter once every 12-24 hours, the starter became quite large and I now will have to bake some sourdough bread to use it up (I'm not complaining.).

Another difficulty with the bread came from the fact that I needed a special pan called a Pullman pan.  Apparently the long bake time of the bread can cause it to get too dark on top and dry out, so I needed a special type of pan with a snazzy sliding lid.  This I easily found on amazon.com, and it, too, quickly came.  I was right on track to make this bread.  Or so I thought.


The recipe calls for two ingredients that I wasn't positive I could find: high-gluten flour and pumpernickel flour.  Rather than having to go to many different stores to get these, I ordered them from King Arthur Flour.  Feeling proud of myself for planning ahead; with the sourdough starter, Pullman pan, and obscure-ish flours en route to my front door; I went to Whole Foods on Sunday, June 16 to get the other ingredients.  Roadblock.  They had no cracked rye (but they did have pumpernickel flour).  This was troubling to me, as I needed it not only for the recipe, but at least 36 hours before I planned to eat the bread.  So I went to Cub Foods.  No cracked rye (but they did have pumpernickel flour).  So I went to the internets and ordered some from Bob's Red Mill.  Still planning on cooking the meal on Thursday, I paid extra on the shipping so it would arrive Wednesday.  That way I could make the sour Wednesday night, bake the bread Thursday afternoon, and take my chances on the slicing with the gummy interior.  It arrived Thursday.  Knowing that I couldn't cook the meal Friday nor Saturday night because of prior dinner plans, I decided to bake the bread on Saturday and make the meal on  Monday.

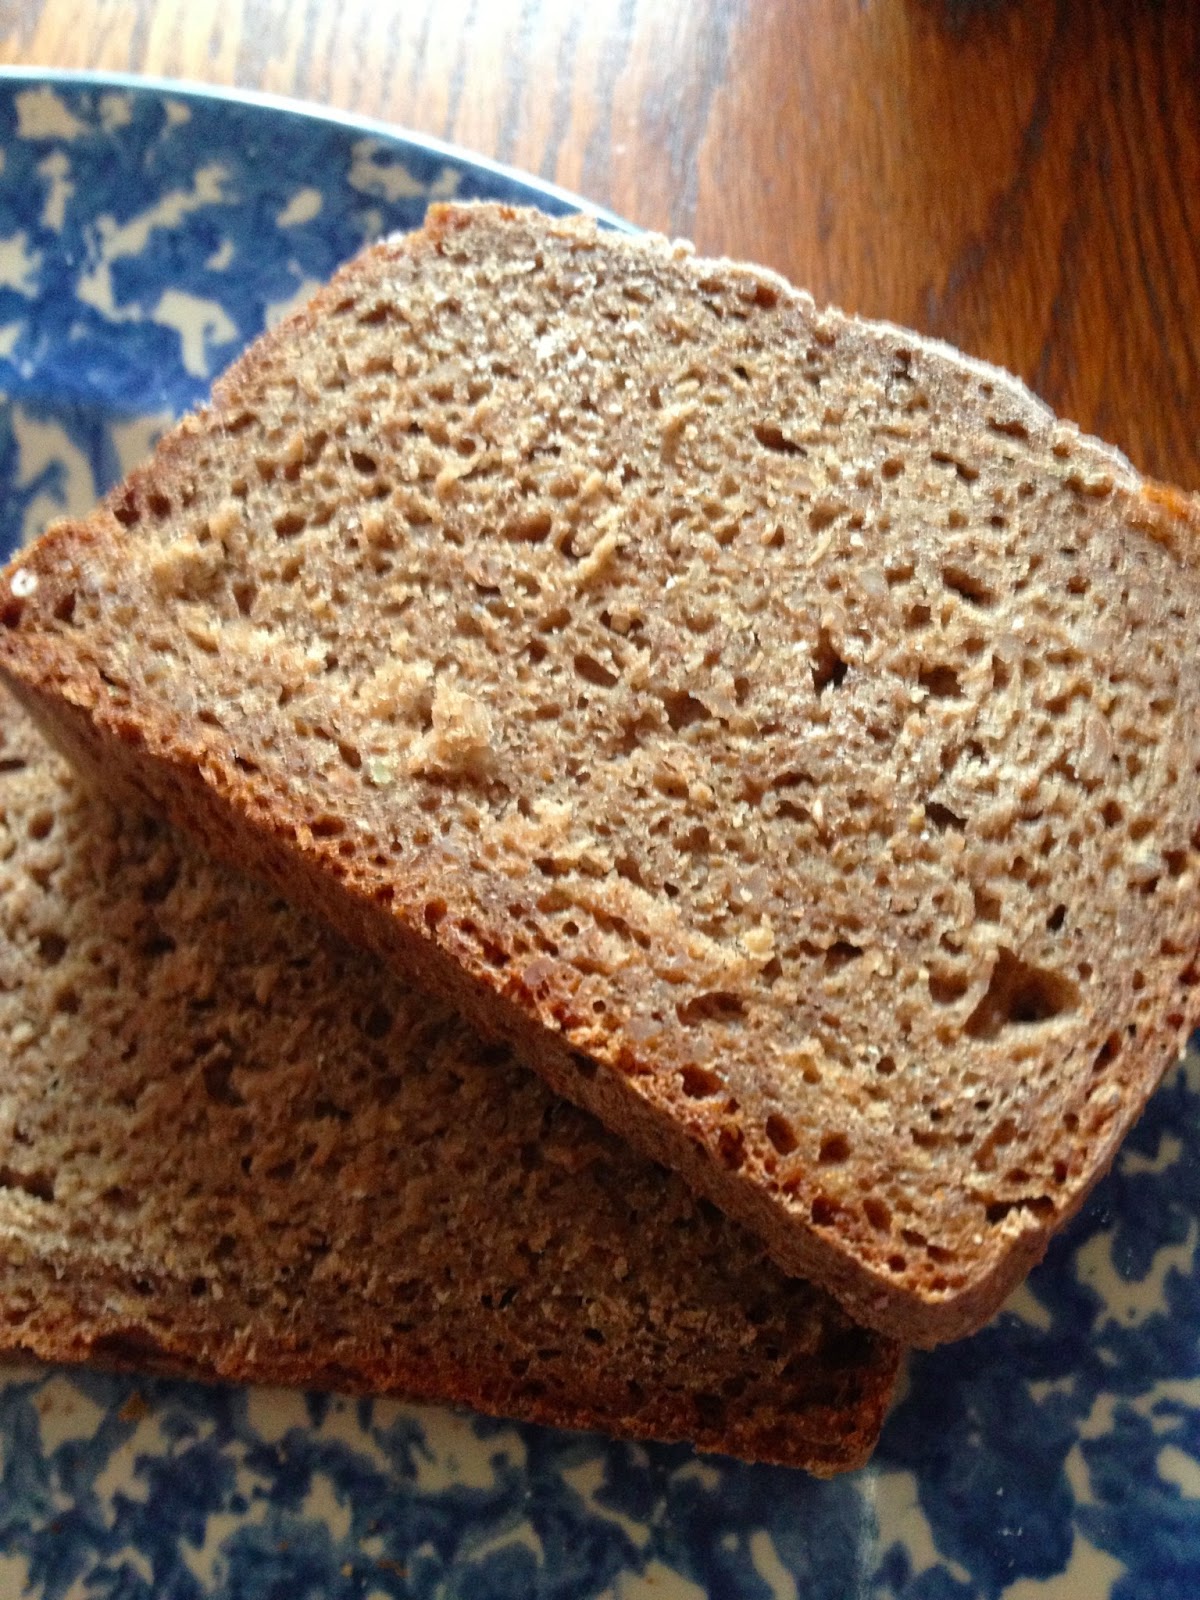
The actual making of the bread was pretty uneventful aside from the fact that it took WAY longer than one hour to rise.  I ended up setting it out on the deck where it was warmer and more humid than in the air-conditioned house.  Even in doing this, it still wasn't 1" from the top of the pan after three hours, but I had to get it in the oven, so I baked it before it had completed its rise, making denser bread.


And that was all just for the bread... I did find a recipe for verivorst, but I wasn't comfortable using ingredients such as 1 qt. of freshly certified blood or 7-8 commercial intestines.  So I decided to call around.  I tried Kramarczuk's, a local Eastern European sausage company, and while they did have blood sausage, it is made with buckwheat and verivorst is made with barley.  I found some blood sausage made with barley at Mackenthun's Meats, but they are located in St. Bonafacius, which is about 35 miles away.  A helpful woman there did inform me that they would ship it to me, but that would have cost about $15, and I wasn't willing to pay $20-25 for one pound of blood sausage that I may or may not like.  I called Clancey's Meats and Fish, but they make it with breadcrumbs, not barley.  It seemed that a trip to St. Bonafacius was my only hope.  Then suddenly I remembered reading that verivorst is closely related to Finnish blood sausage (called mustamakkara), as Finland and Estonia are actually quite close to each other.  I called Ingebretsen's, a local Scandinavian food shop, and - HOORAY - they make blood sausage using barley (and rice, but whatever. Close enough, and WAY closer than St. Bonafacius)!  Plus, they sell lingonberry jam, which is often served aside the verivorst.


So on Saturday, I headed over to Minneapolis around 3:30 to get the blood sausage at Ingebretsen's, not thinking about the terrible storms we had on Friday night that wiped power out for the majority of Minneapolis.  I was almost thwarted again when I got to Ingebretsen's and the door was locked... But, I saw people in there, and a woman graciously let me in even though their power had just come on about two hours prior and there was a giant hole in the ceiling with major water damage.  A kind man cut me the blood sausage, I bought the lingonberry preserves, and I was on my way.  A shout out to Ingebretsen's for their great customer service even when their store is dealing with unforeseen circumstances. I am for sure keeping them in mind when I get to Finland!


Blood sausage (verivorst impersonator)

ANYWAY, this was not an easy meal to put all together, although the cooking of it all was easy.  And after all of that rigmarole, we were very underwhelmed.  The bread was incredibly dense (I will probably make croutons with the leftovers), the mulgikapsad was rather bland (both in color and in taste), and the blood sausage was also bland.  I really didn't like the texture either, and I couldn't help but gag a little when I thought about how it was made mostly of congealed blood.  All in all, I was disappointed.

Estonian Black Bread


Ingredients:
Soaker
- 2 1/4 oz. cracked rye
- 4 oz. cool water
Rye Sour
- 9 oz. whole rye (pumpernickel) flour
- 8 oz. water
- 1/2 oz. ripe sourdough starter
Dough
- 6 oz. water
- all the soaker
- all the rye sour
- 7 1/2 oz. ripe sourdough starter
- 1 1/2 tsp. blackstrap molasses
- 4 1/2 oz. high-gluten flour
- 1 tsp. whole fennel seed, coarsely ground
- 2 tsp. yeast (not rapid rise)
- 2 tsp. salt
- 1 T. cocoa powder

Directions:
1) Combine the cracked rye and water in a small, nonreactive container.  Cover and let soak overnight.


Soaker before
Soaker after sitting overnight

2) Combine the rye flour, water and starter and mix until smooth. Dust the surface with rye flour, cover and let stand for 12-15 hours.
Rye sour before
Rye sour after 12-15 hours

3) Coat the Pullman pan and lid with vegetable spray.  Dust the pan with rye flour.
4) Combine all the ingredients in a large bowl.  Knead for 8 minutes.  The dough will be VERY sticky.
5) Transfer the dough to the prepared Pullman pan, leveling it off.  Dust with rye flour and slide the lid on the pan.  Let rise until it is within one inch of the top.


6) Preheat oven to 500 degrees. Place pan in oven and bake 15 minutes.  Reduce temperature to 400 degrees and back another 15 minutes.  Remove the lid, reduce the temperature to 325 degree and bake until done, about 45 more minutes.
7) Remove the bread from the oven and immediately turn it out of the pan onto a wire rack to cool completely.  Let sit for 24 hours before slicing.


Mulgikapsad


Ingredients:
- 2 1/2 lb. lean pork, in one piece
- 4 1/2 c. sauerkraut
- 3/4 c. uncooked barley
- 1 bay leaf
- salt and pepper
- boiling water

Directions:
1) Put meat in a heavy casserole.  Cover meat with sauerkraut.  Rinse barley in cold water and add to meat with bay leaf, salt and pepper.


2) Pour in boiling water until barley is covered.  Cover.  Simmer over low heat until meat is tender, about 1 1/2- 2 hours.  Stir, adjust seasoning, and serve.


Wednesday, June 12, 2013

Eritrea

Zigni with Injera


I made this meal on Wednesday, June 12.  I was nervous about it because the Berebere pepper spice mix has five tablespoons of cayenne in it... I almost cut it back, but then thought that if I'm going to do this, I'm going to do this!  I'm glad I did; there was most definitely heat, but it was heat in the complex, spice-y way, kind of like Indian food.  I thought the Zigni was awesome.

I have had injera before - a student brought some in to class once - but I had never made it.  I mixed the teff flour and water on Monday and let it sit until Wednesday on the counter under a dish towel to ferment.  I really didn't think that it would be that hard considering the fact that the recipe I used kept likening the process to making pancakes.  Boy, was I wrong!  All was fine until I had to take it out of the pan, and then it fell apart.  I thought I maybe didn't have enough oil... Nope, that wasn't the problem.  Then I thought that maybe the heat was too high?  Nope.  I had no idea what I did wrong, but as you can see from the pictures, it did NOT turn out.  And, it's not like I could whip up more batter to try again, as it has to ferment for 1-3 days.  I researched it a bit more after I had destroyed my injera, and found this website, which tells me that I used the wrong pan, was supposed to cover it, and let it cool before I tried to handle it.  Good to know.  I guess I'll get another chance to try making injera in two weeks when I do Ethiopia.

The injera seemed to taste right.  It was tangy and sour, just like I remember it being from when my student from Ethiopia brought it in.

The traditional way to serve zigni with injera is to lay pieces of injera down.  It then acts as the tray for the zigni.  No utensils are used; torn off pieces of the injera serve as a scoop for the zigni, and the meal is done once all of the injera is eaten, and by the time you get to the stuff that was under the zigni, it has soaked up a good amount of highly flavorful zigni liquid.  Obviously, given my struggles with the injera, I couldn't eat it this way completely.  I was able to get a couple of bites of zigni using injera as my utensil.

Zigni


Ingredients:
- 2 lbs. stewing beef, in cubes
- 1/4 c. vegetable oil
- 2 large onions, chopped
- 4 cloves garlic
- 2 cans tomatoes, with liquid (the recipe was only this specific; I used two 15 oz. cans of diced)
- salt and pepper
- fresh cilantro (optional)
Berebere pepper ingredients:
- 1 tsp. ground ginger
- 1/2 tsp. ground coriander
- 1/2 tsp. ground cardamom
- 1/2 tsp. ground fenugreek
- 1/4 tsp. ground cloves
- 1/4 tsp. ground allspice
- 1/4 tsp. ground cinnamon
- 1 T. salt
- 5 T. cayenne pepper
- 2 T. paprika
- 1 tsp. fresh ground black pepper

Directions:
1) For the berebere, combine the spices and roast in a dry skillet on low to moderate heat, stirring constantly, for about 5-10 minutes or until roasted.  Store in a tight jar.


2) For the stew, fry the meat on high until brown, then add the onions, and eventually the garlic and 3 T. berebere, which are NOT to become burnt.
3) Add the tomatoes with their liquid and simmer until the meat is tender and the stew has thickened (30-60 minutes).
4) Garnish with cilantro and serve hot on injera.


"Injera" (I put quotation marks around it because my destruction of it does not do justice to actual injera)
What injera is supposed to look like


What mine looked like


Ingredients:
- 1 c. teff flour
- 1 c. lukewarm water
- 1/2 c. soda water
- 1 tsp. salt
- sunflower oil

Directions:
1) Mix teff flour with water and let stand in a bowl covered with a dish towel, at room temperature, until it bubbles and has turned sour.  This may take as long as three days.  The fermenting mixture should be the consistency of pancake batter.

After fermenting for two days


2) Add soda water and stir in salt.


3) Lightly oil a large frying-pan.  Heat over medium heat.  Then proceed as you would with pancakes.  Cook briefly in the covered frying pan until holes form in the injera (like pancakes) and the edges lift from the pan.


Remove.  (Here is where I ran into problems).

5) Let injera cool

Attempt 1
Attempt 2


All three attempts...

Thursday, June 6, 2013

Equatorial Guinea

Guinean Fish Grill with Three Sauces and Fufu


Meh.  This wasn't delicious, but it wasn't horrible either.

I made this meal on Thursday, June 6, 2013.  It is the first international cooking project dish I made in our new house!  I decided to quarter the recipe from the original in case we didn't like it (many of the African meals have not been our favorites...).  This was definitely a good idea, and even though I quartered the sauce recipes, they each still made WAY too much and I ended up putting a lot down the garbage disposal.

I did like the fish and the fufu.  On the fish I could definitely taste the lime and a slight heat from the habanero, which I liked.  The sauces, however, really masked those flavors.  The fufu was good too; it was mashed yam with butter and salt... what could go wrong?

Of the three sauces, the avocado was my favorite.  It had a fresh taste that I liked, and it wasn't too heavy with the fish.  My second favorite was the peanut sauce, which was bland on its own, but surprisingly complemented the fish fairly well.  A little of it went a long way, though.  I wasn't a big fan of the spinach sauce, which I thought I'd really like because of the smoked fish.  I think it was the flavor of the palm oil that didn't really do it for me.

The other fufus I have made have been with cornmeal.  I found a West African (where Equatorial Guinea is) recipe for a fufu made with white yams.  It is essentially a mashed yam ball and FAR yummier than the cornmeal versions I have had.

Every component of this recipe was fairly simple, but it was difficult to have five things going at once.  Here was the stove:


I hate to say it, but I just have not been a big fan of West African food.  I find the flavors rather boring (even when they're spicy) and the textures really dense.

Guinean Fish Grill

Ingredients:
- 2 firm fish steaks (I used tuna) about 8 oz. each
- 1 garlic clove, crushed
- 1/2 habanero, minced or pounded to a paste
- 1/4 c. lime juice
- 1 T. palm oil
- salt and pepper

Directions:
1) Rinse the fish then drain and blot dry with paper towels. Season the fish liberally with salt and black pepper then place in a glass or ceramic baking dish.
2) Add the garlic and habanero then pour the lime juice over the top. Turn a few times to ensure that they're evenly coated then place in the fridge to marinate for 90 minutes.
3) When ready, heat a grill or barbecue. Drain the fish and blot dry before brushing with oil and seasoning with salt and black pepper. Cook for about 4 minutes per side.
4) Arrange on a plate and serve with the sauces.

Peanut Sauce
Ingredients:
- 2 c. water
- 1 bouillon cube
- 1/4 c. onion, chopped
- pinch oregano
- 1 garlic clove, minced
- 3/4 tsp. lemon juice
- 1 1/2 tsp. tomato paste
- pinch cayenne
- 1/4 lg. tomato, diced
- 1 1/2 c. natural peanut butter
- 1 habanero, pounded to a paste


Directions:
1) Heat the oil in a pan and fry the onion and garlic until tender.
2) Add all the remaining ingredients (except peanut butter and habanero) and bring to a boil. Reduce to a simmer, then add the peanut butter. Stir to dissolve and allow to simmer gently for 50 minutes to thicken the sauce.
3) Add the habanero.

Spinach Sauce
Ingredients:
- 5 oz. spinach, chopped
- 2 oz. smoked fish, flaked (I used whitefish)
- 1/4 lg. onion, chopped
- 1 T. natural peanut butter
- 3/4 c. warm water
- 1/3 c. palm oil
- 1 whole habanero, scored


Directions:
1) Fry the onion in a little of the palm oil until softened.
2) Mix the peanut butter with the water and add to the pot along with the other ingredients except palm oil. Bring to a boil and simmer for 20 minutes, until well thickened.
3) Add the palm oil and remove the chillies. Cook for a further 10 minutes. 

Avocado Sauce
Ingredients:
- 1/2 c. beef stock
- 1/2 c. water
- 1/4 habanero, pounded to a paste
- 1/4 tomato, chopped
- 1 1/2 tsp. lemon juice
- 1/2 lg. avocado, sliced
 - 1 T. natural peanut butter


Directions:
1) Bring the water and stock to a boil and add all the ingredients except the peanut butter. Reduce to a simmer and cook for 20 minutes.
2) Extract 6 tbsp of the broth, mix with the peanut butter and return to the pot. Cook for a further 10 minutes. Allow to cool and serve warm.

Fufu

Ingredients:
- 1 pound white yams
- 1 T. butter
- salt and pepper to taste


Directions:
1) Place the unpeeled yams in a large pot, cover with cold water, and bring to a boil over medium-high heat.  Boil for 15-30 minutes, or until the yams are cooked through and tender.  Drain and let cool somewhat.
2) Peel the yams, chop them into large pieces, and place them into a large bowl with the butter, salt and pepper.  Mash with a potato masher until very smooth.
3) Place the fufu into a large serving bowl.  Wet your hands with water, form into a large ball, and serve.

Sunday, June 2, 2013

Back from a L-O-N-G hiatus

Well, it's that time of year again when the school year is coming to a close, and I once again have time for this project that is all but forgotten for 5/6 of the year...

AND, just like last summer, upon opening up this blog, I realize that I never posted one of the recipes I made, which was for El Salvador.  So, I will get that up once I locate the pictures I took and review the recipe to hopefully jolt back some memories.

Excuses time: My reasons for abandoning the project last summer were twofold.  One, I was nannying my nephew every weekday except Friday until about 4:30.  This made extensive cooking projects difficult, especially since I was out of town almost every weekend.  I'm not complaining.  I'd choose Johnny over cooking any day!  Unfortunately for me, but lucky for this project, nannying him this summer didn't work out due to daycare restraints.  I'm really bummed about it, but it leaves a lot more time for me this summer, which will hopefully be a good thing (I hope I don't go crazy with too much time to think!).  I am teaching summer school, but that's done at 10:30 every morning.  The second reason that the International Cooking Project didn't work out was because I split a CSA (Community Supported Agriculture) box with my sister and brother-in-law last summer.  This meant that I had more fresh, local vegetables, herbs and fruits than I knew what to do with!  I already ended up wasting a lot of that, and adding a recipe a week that didn't incorporate massive amounts of the CSA contents felt even more wasteful.  We're doing the CSA again, but with so much more open time this summer, I feel that I can do a lot more cooking and baking to make better use of the CSA contents and therefore open up room for one ICP recipe a week.  I may end up giving away some food... Zucchini bread, anyone?

ANYWAY, I'm back at it.  With a summer that is far less busy, I'm excited to get back at it again.  I will start this Thursday, June 6 with a fish recipe from Equatorial Guinea.  It's very Africa-y (which makes sense...), with a lot of habanero, tomato and peanut butter.

Cheers!